Maps are a convenient way of visualizing geographical information and unlocking insights that may be harder to grasp using other formats. Tableau supports maps out of the box and can showcase information up to zip code and street level. To create a map, follow these steps:
- The easiest way to create a map is to double-click on the geographical field of your choice. Geographical fields are indicated by a small globe next to their name, as shown in Figure 5.56:

Figure 5.56: Geographical fields marked with globe icon
- Any field can become a geographical field; the steps to follow have been described in Chapter 3.
In this case, the field of choice is Billing Zip Code; double clicking on it produces the map you can see in Figure 5.57:
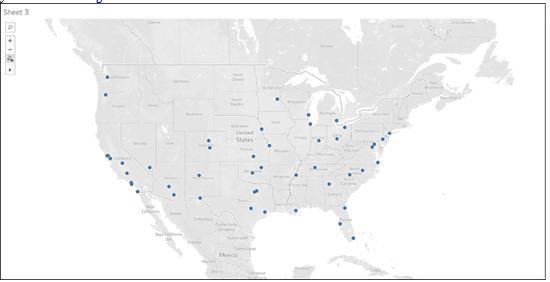
Figure 5.57: Initial map created by double clicking geo field
Before proceeding, you will notice a small set of icons on the top left corner of your map, as shown in Figure 5.58:
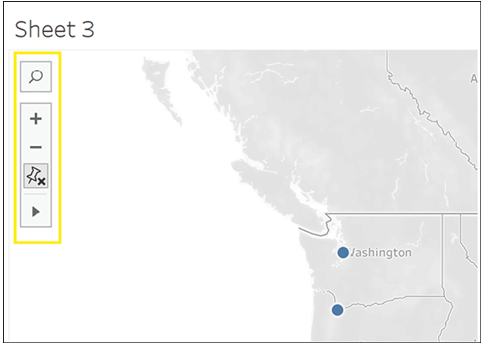
Figure 5.58: Map interaction tool icons
This menu, shown in Figure 5.59, lets you interact with the map and customize the user experience.
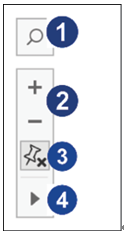
Figure 5.59: Additional map tools menu
Each icon has a function, as follows:
- Search: By clicking on this icon, you can type the name of a specific location you are looking for (that is, London or 09212).
- Zoom in and out: Clicking on the plus sign will zoom into the map, and clicking on the minus sign will zoom out.
- Reset button: Clicking on this button will remove any zoom in or out or any manual adjustments you may have performed on the map.
- Tool selection: Clicking on this icon will open a small sub-menu, from which you can select a variety of tools, as shown in Figure 5.60:

Figure 5.60: Map selection tool options
• Zoom area: Selecting this tool will change your cursor to a lens that you can use to zoom in on a specific part of the map.
• Pan: Selecting this tool will allow you to rearrange the map manually.
• Rectangular/Radial/Lasso Selection: Each tool allows you to select different points in the map according to your needs.
When sharing your map with your end users, you may want to give them access to all these tools or restrict the experience. You may prefer to restrict the tools available for users if you have set up your map to view only a portion. This may be the best display option if that is the area where your insights are concentrated. To do so, follow these steps:
- Click on the Map menu at the top of your Tableau window, as shown in Figure 5.61.

Figure 5.61: Accessing Map menu
- Click on Map Options, as shown in Figure 5.62:
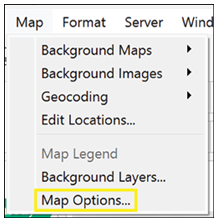
Figure 5.62: Opening Map Options dialog
- A menu will open on top of the map, as shown in Figure 5.63:
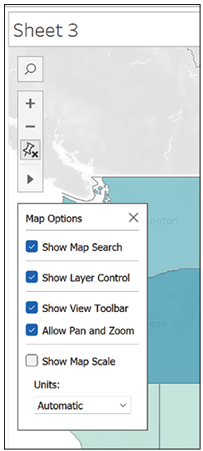
Figure 5.63: Map options dialog
- Unticking an item will prevent the end user from accessing the tool. As you can see below, this time we do not let the end user customize its interaction with the map, and the map tools have, therefore, disappeared, as shown in Figure 5.64:
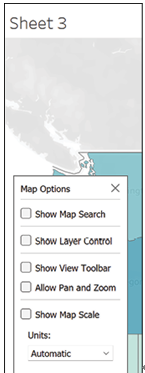
Figure 5.64: Limiting map tools available to user